Superchain App Quick Start
This quick start walks you through an easy three-step process to deploy an app to any OP Chain – in under 15 minutes.
This quick start uses Scaffold-OP to build the Superchain App, covers the setup process, and links to more detailed documentation articles, so you can dive a bit deeper when needed.
Step 1: Get Testnet ETH from Superchain Faucet
You'll need some testnet ETH on OP Sepolia to pay for the gas fees (opens in a new tab) associated with deploying your test application. Use the Optimism Superchain Faucet (opens in a new tab) to get some free ETH on OP Sepolia for multiple OP Chains with just one click. You can request testnet ETH from the Superchain Faucet in one of two ways: connect a wallet or login with Github.
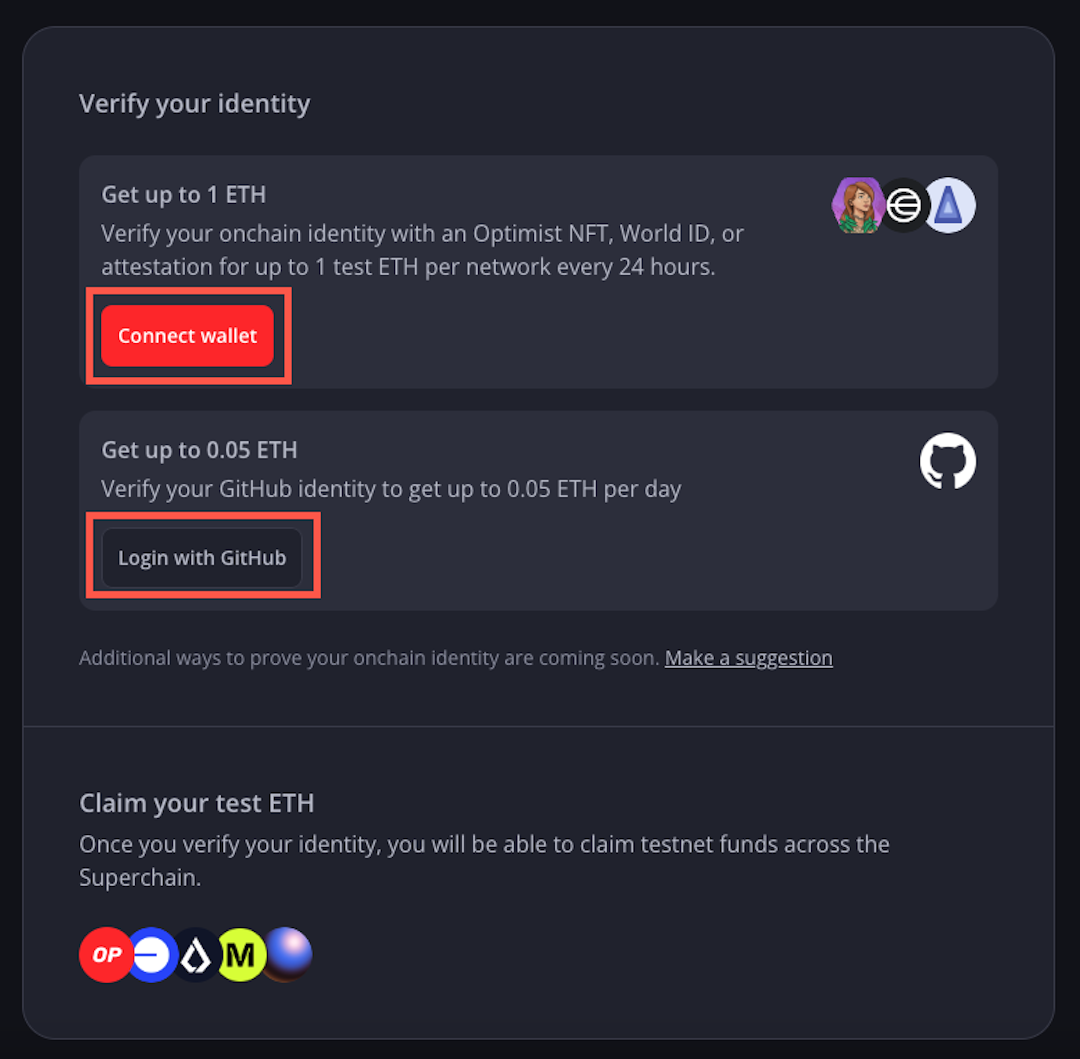
- If you connect a wallet with an Optimist NFT, you can get up to 1 testnet ETH per network every 24 hours.
- If you login with Github, you can get up to 0.05 testnet ETH per day.
Looking for more faucets? You can also try using other available OP Sepolia faucets.
Step 2: Build a Basic App with Scaffold-OP
Scaffold-OP is a fork of scaffold-ETH2 (opens in a new tab) with minimal differences: additional app examples, native support for Superchain testnets, and more low-level instructions.
Scaffold-OP is an open-source toolkit for building decentralized applications on the Ethereum blockchain and is designed to make it easier for developers to create and deploy smart contracts and
build user interfaces that interact with those contracts.
Prerequisites
Before you begin, you need to install the following tools:
- node v18.17 or higher (opens in a new tab)
- yarn v1 (opens in a new tab) or v2+ (opens in a new tab)
- git (opens in a new tab)
Clone the Repo & Install Dependencies
git clone https://github.com/ethereum-optimism/scaffold-op.git
cd scaffold-op
yarn install
Run a Local Network
Use the first terminal to run a local network:
yarn chainThis command starts a local Ethereum network using Hardhat. The network runs on your local machine and can be used for testing and development.
You can customize the network configuration in hardhat.config.ts.
Deploy the Test Contract
Use the second terminal to deploy the contract:
yarn deployThis command deploys a test smart contract to the local network. The contract is located in packages/hardhat/contracts and can be modified to suit your needs.
The yarn deploy command uses the deploy script located in packages/hardhat/deploy to deploy the contract to the network.
You can also customize the deploy script to add a new contract by following these instructions:
- Create a corresponding deployment file in
package/hardhat/deployto specify the deployment process. - For simpler contract deployment: copy over an existing deployment script in the deploy folder and modify the file name and variables.
- For more advanced usage: refer to Hardhat's deployment docs (opens in a new tab) to see what parameters you can specify.
Start your NextJS App
Use the second terminal to start your NextJS app:
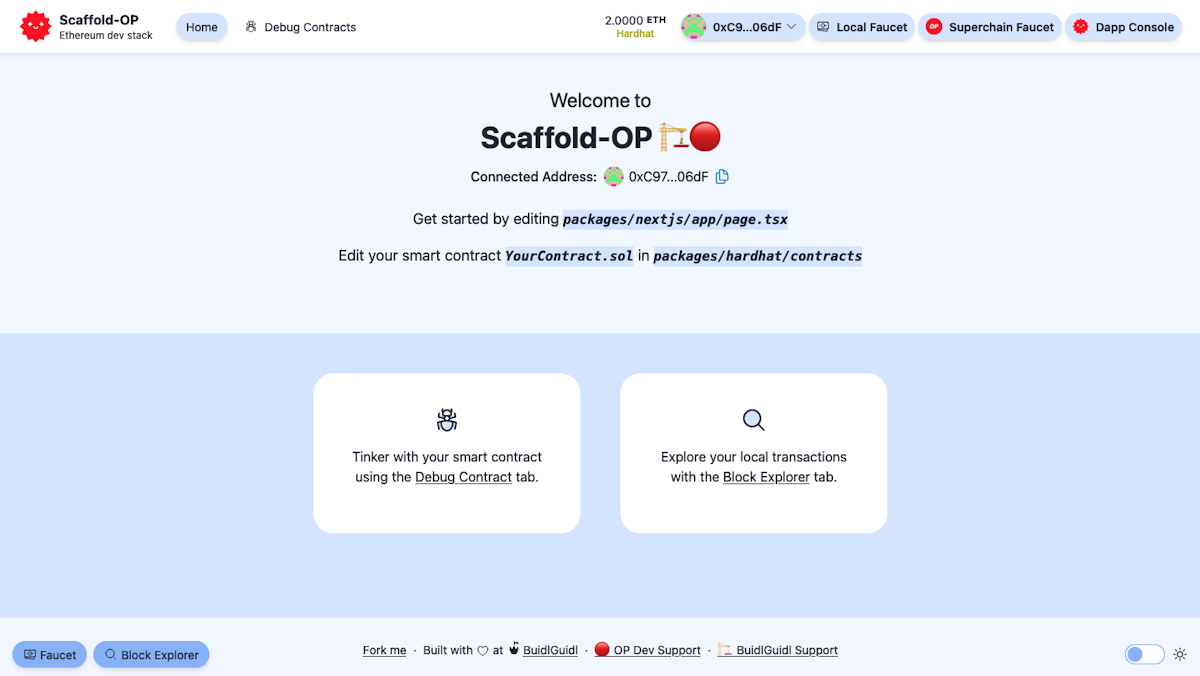
yarn start- Visit your app on
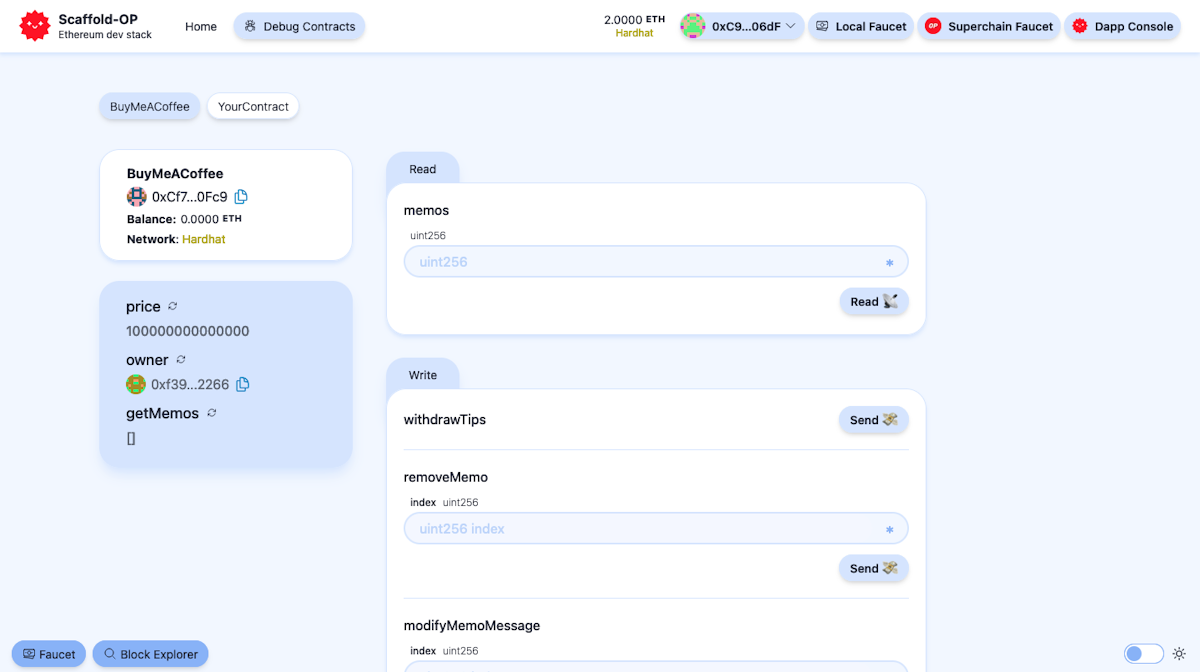
http://localhost:3000. - You can interact with your smart contract using the
Debug Contractspage. You can tweak the app configuration inpackages/nextjs/scaffold.config.ts.
Run smart contract test with yarn hardhat:test
- Edit your smart contract
YourContract.solinpackages/hardhat/contracts - Edit your frontend in
packages/nextjs/pages - Edit your deployment scripts in
packages/hardhat/deploy
Step 3: Deploy Contracts to Superchain Testnets
You will follow the steps below to deploy contracts to a remote testnet (e.g., Optimism Sepolia). Please ensure you have enough Sepolia ETH on all these Superchains before deploying (See Step 1 above).
Make the `.env` file
Inside the packages/hardhat directory, copy .env.example to .env.
cd packages/hardhat && cp .env.example .envSpecify the Environment Variables
Edit your .env to specify the environment variables. At a minimum, you must specify the DEPLOYER_PRIVATE_KEY.
DEPLOYER_PRIVATE_KEY = "your_private_key_with_sepolia_ETH";The contract will be deployed from the address associated with this private key, so make sure it has enough Sepolia ETH (See Step 1 above).
Deploy Smart Contracts to Selected Networks
This step deploys all smart contracts in packages/hardhat/contracts to the selected network(s). Network names are found in hardhat.config.js.
- Inside
scaffold-op, run one of the following options:
yarn deploy --network-options- Use spacebar to make your selection(s).
If the deployments are successful, you will see the deployment transaction hash on the terminal.
Congratulations! You now have an OP Mainnet app ready for development, which can also be deployed to more OP Chains! 🎉
Next Steps
- Share feedback about this quick start or
scaffold-opin the developer forum (opens in a new tab). - You can also add Foundry to Scaffold-OP (opens in a new tab) for more robust and faster testing.
- Visit the app developer tutorials for guides on how to add bridging, wallet features, and L1-to-L2 transactions.